Tuesday, December 8, 2015

Oracle Managed File Transfer (MFT) custom callouts

Originally posted at TMNS Blog

This week I was doing some proof of concept with Oracle Managed File Transfer and exploring in more detail one of its advanced features: custom callouts.
Callouts allow you to execute transfer pre­ and postprocessing. There are some callouts out­-of-­the-­box for compression, decompression, encryption and decryption. The interesting thing however, is that you can build your own custom callouts. Oracle provides some samples on how to build callouts on the MFT website, see bit.ly/learnmft for details.

RunScriptPost

Based on the RunScriptPre_01.zip provided by Oracle, I started by developing a similar callout, but to be used in the Target­post action. Below are some high­level steps on how to do that and a link to the zip file containing all the information you need to test by yourself:
  1. Create a java class (RunScriptPost.java) that implements the oracle.tip.mft.engine.processsor.plugin.PostCalloutPlugin interface
  2. Compile the class, package it in a jar file (RunScriptPost.jar) and copy to $DOMAIN_HOME/mft/callouts/
  3. Create a callout definition file (RunScriptPost.xml) to describe the callout
  4. Run the createCallouts WLST command (createCallout.py) to configure the callout in MFT
Once you complete the steps above, the callout will be available in your MFT Design to be selected in the “add post­processing actions” screen of your Transfers.
Check the README.txt file for a detailed description on how to deploy, configure and test it.
Download: RunScriptPost

GenericWSAudit

After creating the RunScriptPost, I decided to build a second callout to call an auditing web service. I started by defining a service interface for a generic auditing service that could be implemented by anyone that needs to do logging or auditing of the transfers managed by MFT. With the interface available, I’ve created a client jar file with the web service client and created a sample implementation for the service using SOA Suite. Finally, I created 2 callouts, one for Pre Auditing and another for Post Auditing. The steps to create the callout were the same as described above and the result you can get from the link below. Check the README.txt file for details on how to use it.
Download: GenericWSAudit
I hope this can help you to understand how MFT callouts work. Moreover, I expect you can immediately take advantage of the callouts I wrote during this POC.

Thursday, November 5, 2015

How to install Cloud Adapter for Salesforce.com

Originally posted at TMNS Blog
In our recent TechNote we discussed the pros and cons of Cloud Adapter versus Custom Web Service Call. In this How To we will guide you through the installation of Cloud Adapter and detail some of the issues you can face during installation and the changes needed to fix them.

Installation steps cookbook:

  1. To use the Cloud Adapter for Salesforce.com, you need to install the initial 12.1.3.0.0 version of SOA Suite or BPM Suite 12c.
  2. If you want to use it only within a SOA Suite SCA calling the adapter from a BPEL flow, no additional installation is needed.
  3. If you want to create a Business Service in OSB and expose the Salesforce Adapter operations via Proxy Service, there are additional steps that you need to follow (see details in the bottom of the post):    a) Apply Bundle patch 12.1.3.0.1 for SOA Suite or 12.1.3.0.4 for BPM Suite [Issue #1].    b) Create a Security System Policy using Enterprise Manager. [Issue #2]    c) Change server configuration to not validate hostname or allow wildcards in the certificate URLs. [Issue #3]
  4. Follow the Cloud Adapter instructions download the Salesforce supported WSDL and do the additional server configuration changes:    a) Download Salesforce Enterprise WSDL from Salesforce.com Setup web page.    b) Export Salesforce Certificate from the browser and import into the server Keystore using java Keytool.    c) Configure EM Credentials, defining CSF Key and using username and password (with security token).Check all configuration steps here: https://docs.oracle.com/middleware/1213/cloudadapter-salesforce/TKSDP.pdf

Issues and solutions:

Below you have the details for some of the issues you can face during installation and the changes needed to fix them:

#

Issue

Solution

1

If you do not apply the Bundle Patch for SOA/BPM suite, once you call
Salesforce during run-time you should see the error message below:

OSB-380001: Invoke JCA outbound service failed with application error, exception: com.bea.wli.sb.transports.jca.JCATransportException:
oracle.tip.adapter.sa.api.JCABindingException: oracle.tip.adapter.sa.impl.fw.ext.org.collaxa.
thirdparty.apache.wsif.WSIFException:
servicebus:/SBProject/Resources/salesforceReference.wsdl
[ salesforceReferencePortType::create(parameters,parameters) ] –
WSIF JCA Execute of operation ‘create’ failed due to:
JCA Binding Component connection issue.
JCA Binding Component is unable to create an
outbound JCA (CCI) connection.
servicebus:/SBProject/Resources/salesforceReference.wsdl
[ salesforceReferencePortType::create(parameters,parameters) ] – :
The JCA Binding Component was unable to establish an outbound
JCA CCI connection due to the following issue: BINDING.JCA-12561
JCA Resource Adapter location error (WebLogic).
Unable to locate the JCA Resource Adapter via .jca binding file element <connection-factory/>
The JCA Binding Component is unable to locate the Resource
Adapter specified in the <connection-factory/> element:
location=’cloud/CloudAdapter’
 ManagedConnectionFactory=
‘oracle.cloud.connector.salesforce.SalesforceConnectionFactory’
(properties: {csfkey=SalesForceKey, applicationVersion=34.0, csfMap=oracle.wsm.security, jndi.location=cloud/CloudAdapter, targetWSDLURL
=servicebus:/SBProject/Resources/enterprise.wsdl})
The reason for this is most likely that either
 1) the Resource Adapters RAR file has not been deployed successfully to the WebLogic J2EE Application server or
 2) the JNDI <jndi-name> setting in the WebLogic JCA deployment descriptor has not been set to cloud/CloudAdapter. In the last case you might have to add a new ‘connector-factory’ entry (connection) to the deployment descriptor.
Please correct this and then restart the WebLogic Application Server

Caused by: javax.naming.NameNotFoundException: While trying to lookup ‘cloud.CloudAdapter’ didn’t find subcontext ‘cloud’. Resolved ”; remaining name ‘cloud/CloudAdapter’

There are 2 solutions for this issue:

1) manually changing the connection mode parameter in the advanced section for transport on business service in OSB console after deploy:
1.       open OSB console
2.       create a session
3.       click on project and then on business service for salesforce
4.       open the Transport detail tab
5.       open advanced section and change connection mode to unmanaged
6.       activate the session in console
2) patching to 12.1.3.0.1 or up and no manual configuration will be needed

2

If you do not create the Security Policy, once you call Salesforce in run-time you should see the error message below:

javax.resource.ResourceException: Unable to create Cloud Operation:
  at oracle.tip.adapter.cloud.CloudAdapterInteraction.create
CloudOperation(CloudAdapterInteraction.java:274)
  at oracle.tip.adapter.cloud.CloudAdapter
Interaction.execute(CloudAdapterInteraction.java:136)
  at oracle.tip.adapter.sa.impl.fw.wsif.jca.
WSIFOperation_JCA.performOperation
(WSIFOperation_JCA.java:537)
  at oracle.tip.adapter.sa.impl.fw.wsif.jca.WSIFOperation_
JCA.executeOperation(WSIFOperation_JCA.java:374)
 ….
Caused by: oracle.cloud.connector.api.CloudInvocationException: Unable
to find username in credential store.
  at oracle.cloud.connector.salesforce.
SalesforceSessionManager.get
SessionRequestMessage(SalesforceSessionManager.java:63)
  at oracle.cloud.connector.impl.
AbstractRemoteSession
Manager.establishSession(AbstractRemote
SessionManager.java:37)
  at oracle.tip.adapter.cloud.CloudAdapterInteraction.create
CloudOperation(CloudAdapterInteraction.java:253)

The steps below describe how to create the Security Policy needed:

1. Log in to Fusion Middleware Control Enterprise Manager.
2. Expand “Weblogic Domain” in the left panel
3. Right click on the domain you want to modify and select Security > System Policies to display the page System Policies.
4. In the System Policies page, click on “Create…” button.
5. In the Codebase field enter the path to the jar file i.e file:${osb.oracle.home}/soa/modules/oracle.
soa.adapter_11.1.1/jca-binding-api.jar
6. In the Permissions section click on “Add” button.
7. In the new window modify the “Type” field to “Principal” and click on the search button. Select the “Administrator” permission and click “Ok”
8. Back in the previous windows you will see now under Permissions “oracle.security.jps.service.credstore.CredentialAccessPermission”
9. Select “oracle.security.jps.service.credstore.Credential
AccessPermission” and click on “Edit…” button and modify it as follow:
Resource Name: context=SYSTEM,mapName=SOA,keyName=*
Permission Action: *
10. Click on “OK” to save the new permission.
See more details at Oracle Support “SOA/OSB 12c: Cloud Adapter Patch Reference (Doc ID 1917423.1)”

3.

If you do not change the server configuration related to hostname validation, once you call Salesforce in run-time you should see the error message below:

javax.net.ssl.SSLKeyException
Certificate chain received from [URL – IP] failed hostname verification check. Certificate contained *.[URL] but check expected [URL]

There are 2 options to solve this:

1. Disable hostname verification, as explained by the Cloud Adapter documentation (“Set Hostname Verification to None”)
2. Change Hostname Verifier to allow wildcards:
1. Go to the WebLogic admin console -> Environment -> Servers -> your server -> Configuration -> SSL
2. Click “Lock & Edit”
3. Open the “Advanced” flap
4. Change “Hostname Verification” from “BEA Hostname Verifier” to “Custom Hostname Verifier”
5. Set “Custom Hostname Verifier” to weblogic.security.utils.SSLWLSWildcardHostnameVerifier
6. Click “Save” and then “Activate Changes”
7. Restart your server.

4

Once you create a new Salesforce Adapter instance selecting SOSL/SOQL, in case you add parameters to the query, you can get the error message below once you complete the wizard and the Business Service is not created.

Failed to generate the business service
error: Unexpected character encountered (lex state 3): ‘

The workaround for this issue:

is to create the Salesforce Adapter instance without any query parameter and, after completing the wizard, right-click on the adapter and select “Edit JCA”, running the adapter wizard again and replacing the query, including the parameters. This time the wizard will complete as expected and all adapter metadata files will be updated accordingly.

Wednesday, October 28, 2015

Salesforce.com integration: Cloud Adapter versus Custom Web Service call

Originally posted at TMNS Blog
As part of Oracle Fusion Middleware 11.1.1.7, Oracle introduced the Cloud Adapter for Salesforce.com integration. In this TechNote we will first provide some general information about Cloud Adapter and shortly describe the support, behaviour and restrictions. Then we will proceed with comparing Cloud Adapter and Custom Web Service call, state strengths and limitations of each approach, and end with some final recommendations.

Cloud Adapter integration
Cloud Adapter offers a single integration platform to unify cloud and on-premises blog-salesforce-adapter1applications, reducing the effort to manage authentication, session management and transformation mappings that is usually needed when you build a direct integration with Salesforce using the WSDL API. Depending on the business needs, integration can be done from different systems and in different areas and data sets: Account, Contact, Product, Invoice, Billing, Order, Fulfilment, integrating hundreds of objects existing in Salesforce.
Following the usual Adapter Wizard approach, the integration can be easily created by browsing, searching and selecting one or more Salesforce business objects and operations. It also allows modelling of SOSL/SOQL queries, providing design time validation capabilities.
blog-salesforce-adapter2The Cloud adapter is available in the 11g (11.1.1.7) and 12c versions of Oracle Fusion Middleware.Although we expect to have out of the box functionalities with this new feature in the Middleware platform, the initial set up needs some attention and manual configuration on the server side. We will soon post another blog in which you will find the installation steps needed to have the Cloud Adapter for Salesforce.com integration working in both SOA Suite and OSB. We’ll be using Oracle 12c as reference for all technical details.


Adapter support, behaviour and restrictions
The Cloud Adapter for Salesforce.com supports the following operations:blog-salesforce-adapter3
CategoryOperation
COREconvertLead, getDeleted, getUpdated, merge, undelete, upsert
CRUDcreate, retrieve, update, delete
MISCgetUserInfo, process
SOSL / SOQLquery, queryAll, search, queryMore

During design-time, each time you instantiate a Salesforce Adapter in your SCA or OSB, an operation needs to be selected and for each operation, you can choose a set of Salesforce objects that will be affected. Each invocation of the adapter instance should be seen as a transaction within Salesforce. There is a header property “All or None” that allows you to say what to do in case of an intermediate failure: rollback all changes or keep what was already changed.
During run-time, the Adapter will handle the user session in a transparent way, storing the session in the cache for future calls and avoiding multiple calls to login the user.
blog-salesforce-adapter4
There are restrictions on the number of objects that can be selected for one Salesforce instance. The number of objects vary depending on the operation being selected. In addition to that, when you instantiate the adapter (and thus select the operation and objects), if you need separate transactions or need information from one object (e.g. account ID) to be added to another object (e.g. contact), you will need to create two separate adapter instances, make two separate calls and handle the distributed transaction and compensations.
Recommendation
After the environment is correctly set up, the use of the Cloud Adapter is really straightforward. If you have a custom integration that involves a simple scenario, with only a few interactions with Salesforce and operations on top of a reduced number of objects, the use of Cloud Adapter is suggested to easily process the Salesforce requests. For complex scenarios with multiple interactions with Salesforce or for a generic approach that allows any call to be made to Salesforce, the use of Cloud Adapter may be too time consuming, due to the particularities related to the way Salesforce Adapter is created in your project. In these cases you will need to create one instance of the adapter for each different object and/or operation.
Alternate approach
For complex scenarios it might be better to interact directly with Salesforce API using the Enterprise WSDL. You will need to manage the sessions (login/logout) in your custom code, but it allows you more flexibility to create a generic approach and reuse it.
blog-salesforce-adapter5
The custom Proxy or Business Service can be built based on the same WSDL used for Oracle Cloud Adapter. You need to import the WSDL as a web service reference and call the expected operation, sending the Salesforce Business Object as a payload.
Before you call the service to query or change objects, however, you need to call the Login operation and handle the Session ID received back, that needs to be included in any subsequent requests. As a recommendation, it would be better to handle the session separately from the integration code and keep the session alive on the server side using a more robust approach, reusing the same session for multiple calls. In this case, you should be able to handle the exceptions in case of Salesforce invalidating the session, doing the login again and retrying the failed transaction.
Salesforce has a limit on the number of logins that you can do per day and expects you to store the Session ID and Server URL for multiple calls. It means that you should not login/logout for each operation, otherwise your logins will start to be rejected. In addition to that, the way Salesforce handles session, once you do a login, the session will be opened on the Salesforce side and any next logins done by the API will join the same session, instead of creating a new one. It means that if you do a logout, you will be invalidating the session not only for your flow instance, but for all flows that did a login while your session was active. The recommendation in this case is to NOT logout. Just do a login if you do not have the Session ID and keep the session alive, handling only the exceptions in case the session is terminated by Salesforce to do the login again.
Below is a comparison between the two approaches, with advantages and disadvantages of each one.
Strengths
Oracle Salesforce cloud adapterDirect call to Salesforce API
Straightforward wizard based approach during designAll operations exposed in one API
Built-in management of session and authenticationAll objects exposed in one API without restrictions
Easier mapping of data during designCan be a part of a generic framework
Performance restricted only by hardware and Salesforce restrictionsPerformance restricted only by hardware and Salesforce restrictions
Adapter supports up to 6 previous versions of Salesforce.comNo extra license costs

Limitations
Oracle Salesforce cloud adapterDirect call to Salesforce API
It does not work out of the box. Requires additional configuration setup.Extra effort needed in development for session and authentication management
Limitations imposed by Salesforce on number of objects per operation transferred to adapterExtra effort needed for data transformation within BPEL or OSB because of polymorphism
Adapter is limited to only one operation per created instanceRequires more knowledge and experienced developer to make it work
Not generic enough to be used as a part of a frameworkLimitations imposed by Salesforce on number of objects per operation exist although the API itself has no limitations
Extra cost per processor to use on top of every SOA licence

The use of the web service interface from Salesforce is free of charge, so if you follow the direct approach, the cost is limited to the effort to build the custom integration. If you plan, however, to use the Salesforce Adapter to speed up the initial integrations, you need to consider the cost associated to the Adapter, that is around $17.500 per core.

Final recommendations
  • When dealing with only a limited number of operations and objects (one or two different operations on up to 5 objects) on the Salesforce side Oracle Cloud Adapter is preferred as it has authentication and session management out of the box.
  • For complex situations with a large number of tasks that require different operations on multiple different objects, we recommend using direct calls of Salesforce API to achieve flexibility and generic approach.
  • Only the direct invocation of Salesforce API is generic enough to be a part of a framework, so if you plan to include Salesforce in a framework for higher reusability, direct invocation of Salesforce API is the recommended approach.
Choice of integration approach is not made solely on technical information and data, but also on existing environment setup and business requirements, so final choice will depend on the project and use cases it needs to cover.

Sunday, February 13, 2011

EM Test Page: problem with qualified attributes

If you use EM Test Page to test your Composites, pay attention when your XSD define that attributes must be qualified (when it uses attributeFormDefault="qualified" in the schema tag definition). When you fill the input form in EM Test Page, the generated message will not include the attribute qualifiers and attribute values will not be found by the XPath expressions in your components, as I'll show in the example below.

Suppose your XSD as the following:

When you go to the EM Test Page, the following form will be generated based on the XSD:

Go to the "XML View". See that the generated XML doesn't contain the qualifier for the two attributes.

Run the process and check the execution audit trail. See that the attributes values was not found.

Go back to the "XML View" and add the qualifiers manually.

Run the process again and check the execution audit trail. See that the attributes values was found now.

This behavior may take a lot of time until you can identify what is happening.

My suggestion: always use SoapUI to test your SOA Suite Composite Projects. With SoapUI is easy to define your test cases, you can save them to run multiple times and the input messages are generated much more closely to the XSD definition.


To download this sample project and do your tests, click here.

Sunday, January 23, 2011

Implementing Correlation in BPM 11gR1 using BPEL

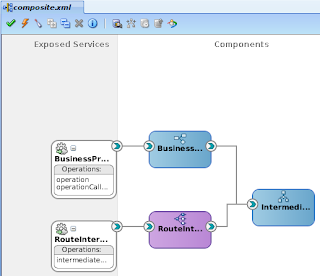
As far as I know, Oracle BPM 11g doesn't have an easy way to implement correlation sets and receive asynchronous messages in the middle of the process using some business information. But as Oracle BPM is in the top of Oracle SOA Suite infrastructure, we can use BPEL to achieve this behaviour. Using BPMN, Mediator and BPEL components together in a composite, we can expose 2 interfaces, one for start the business (BPMN) process and other to expose the asynchronous (BPEL) intermediate message, as I'll show below.

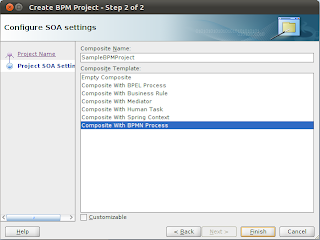
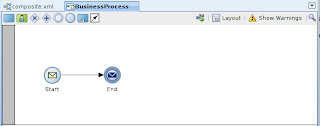
First of all, create a new BPM Project with a BPMN component.

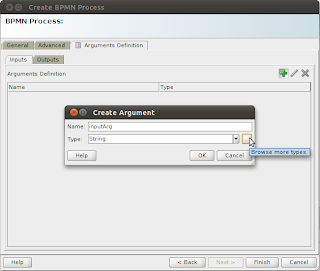
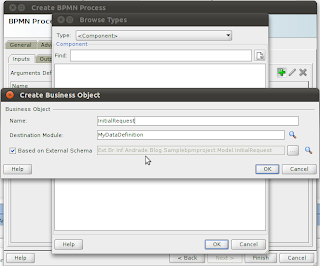
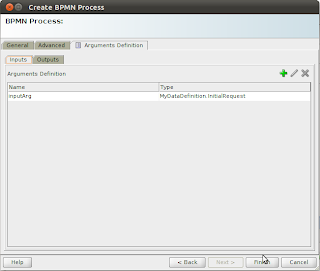
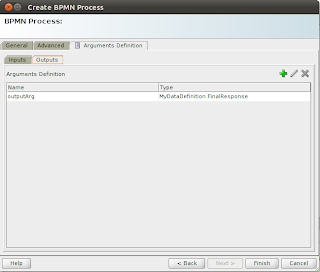
In the "Create BPMN Process" dialog, import an external schema with data definition and define the input and output arguments.


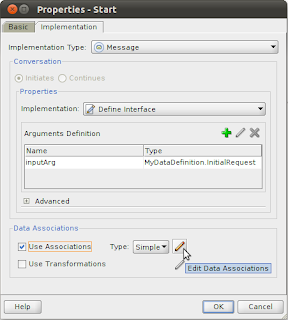
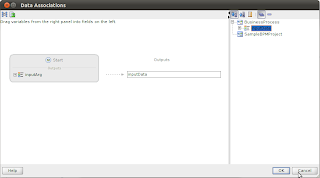
Double click in the "Start" activity and create a new "Data Association".

Create a new "Business Process" variable using the same inputArg data type.

Copy the inputArg data to the new variable created.

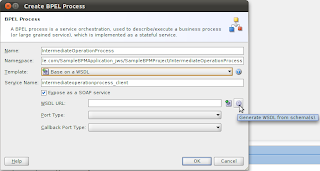
Go back to the composite and add a new BPEL component. Select "Based on WSDL" template and define an asynchronous operation using the same external schema.

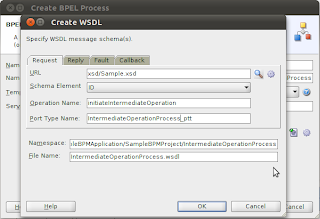
In the "Request" definition, select an element that has the unique business identifier that will be used to correlate the inbound intermediate operation.

In the "Callback" definition, select an element that define the same message that will be received in the middle of the process.

Uncheck the option "Expose as a SOAP service".

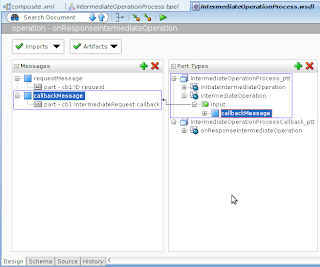
Open the WSDL generated for the BPEL process. Create a new one way operation in the inbound port type to receive the intermediate message in the BPEL process. Use the same callback message that will be returned by the BPEL process.

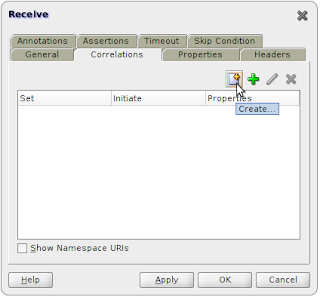
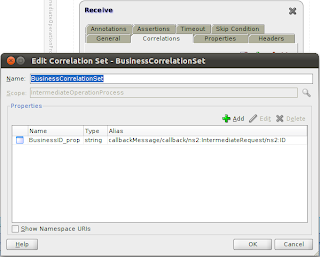
Open the BPEL process and create a new correlation set in the receiveInput activity.

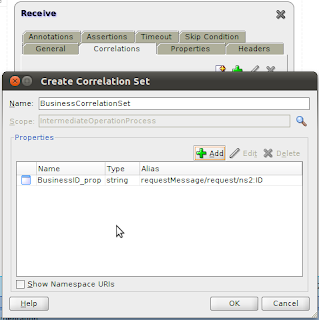
Initialize the correlation set with the unique business identifier received.

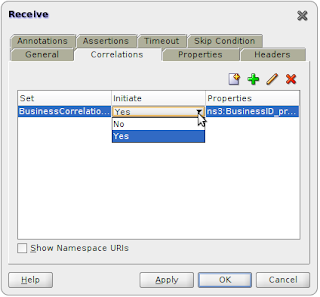
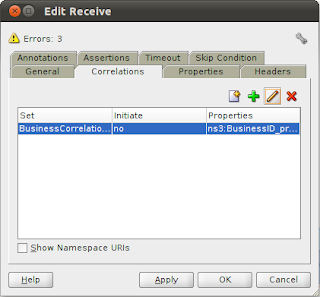
Set the column "Initiate" to "Yes" (To get more informations about how to configure Correlation Sets in BPEL, click here).

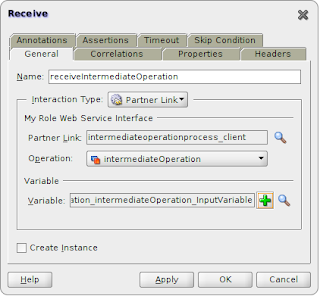
Create a new Receive activity to receive the intermediate operation.

Select the intermediate operation and generate a new variable to receive the intermediate message.

Select the correlation set created previously.

Edit the correlation set to match the unique business identifier received in the intermediate message.


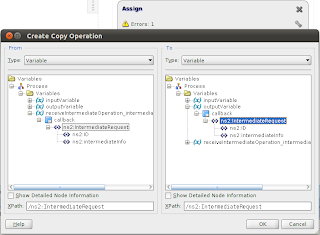
Add an Assign activity to the BPEL process to copy the message received in the intermediate operation to the output variable.

The BPEL process will looks like as the image below.

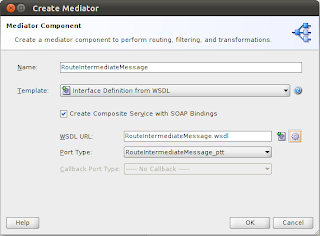
Go back to the composite, add a new Mediator component and select "Interface Definition from WSDL" template.

Define an one-way operation using the same external schema. In the "Request" definition, select the element that define the message that will be received in the middle of the process.


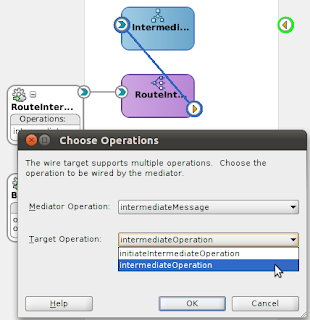
Connect the Mediator to the BPEL component, using the intermediateOperation of the BPEL component as the Target Operation.

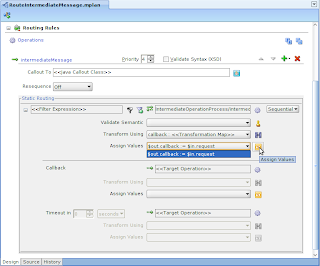
Open the Mediator editor and create an Assign to route the received message. Keep the other configurations empty.

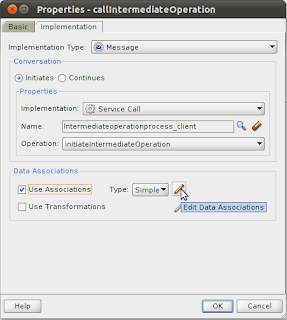
Go back to the BPMN diagram, add a Throw event after the Start event. In the "Implementation" tab, select "Message" as "Implementation Type" and "Service Call" in the "Implementation" properties.

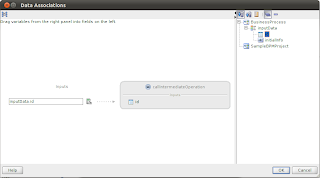
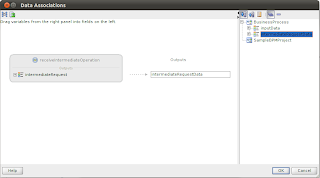
Select the BPEL component interface as the service to be called and create a new "Data Association".

Copy the unique business identifier from the business process variable to the service input variable.

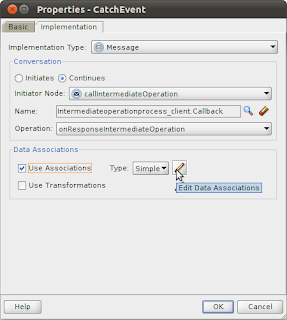
Add a new Catch event after the Throw event created. In the "Implementation" tab, select "Message" as "Implementation Type" and "Continues" as "Conversation" option. Select the throw event as "Initiator Node" and create a new "Data Association".

Create a new "Business Process" variable using the same data type as the intermediate operation returns. Copy the data received to the new variable created.

The final BPMN process will looks like this.

And the composite will looks like this.

Deploy the composite to the server and create a new instance of the business process calling the BPMN process interface.


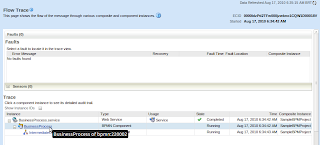
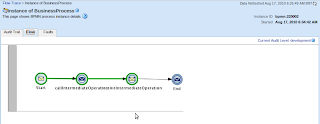
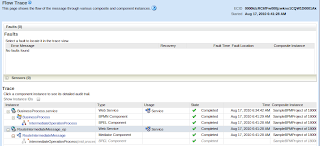
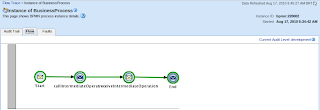
See the execution flow trace.

Check that the BPMN process is waiting in the catch activity.

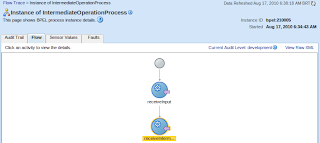
And the BPEL process is waiting in the receiveIntermediate activity.

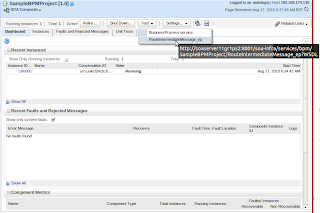
Back to the Enterprise Manager, invoke the intermediateOperation through the Mediator interface.

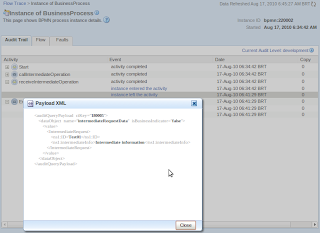
Use the same unique business identifier used to initiate the business process.

See the execution flow trace again. Check that a new instance of the Mediator component was created, but the message was delivered to the BPEL instance created before (through correlation set).

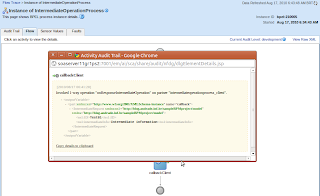
Check that the BPEL instance finished, sending the received message to the caller process.


Check that the BPMN process received the callback message and finished successfully.


This idea can be extended to allow multiple intermediate messages being received during the business process execution. If all intermediate information to be received uses the same message, you can reuse the BPEL process, otherwise you can create additional BPEL components to receive different messages. Other improvement you can do is use the Mediator component in front of all the other components to expose a single interface (WSDL) and route each operation to the appropriate internal composite component.

To download this sample project, click here.