Sunday, February 13, 2011

EM Test Page: problem with qualified attributes

If you use EM Test Page to test your Composites, pay attention when your XSD define that attributes must be qualified (when it uses attributeFormDefault="qualified" in the schema tag definition). When you fill the input form in EM Test Page, the generated message will not include the attribute qualifiers and attribute values will not be found by the XPath expressions in your components, as I'll show in the example below.

Suppose your XSD as the following:

When you go to the EM Test Page, the following form will be generated based on the XSD:

Go to the "XML View". See that the generated XML doesn't contain the qualifier for the two attributes.

Run the process and check the execution audit trail. See that the attributes values was not found.

Go back to the "XML View" and add the qualifiers manually.

Run the process again and check the execution audit trail. See that the attributes values was found now.

This behavior may take a lot of time until you can identify what is happening.

My suggestion: always use SoapUI to test your SOA Suite Composite Projects. With SoapUI is easy to define your test cases, you can save them to run multiple times and the input messages are generated much more closely to the XSD definition.


To download this sample project and do your tests, click here.

Sunday, January 23, 2011

Implementing Correlation in BPM 11gR1 using BPEL

As far as I know, Oracle BPM 11g doesn't have an easy way to implement correlation sets and receive asynchronous messages in the middle of the process using some business information. But as Oracle BPM is in the top of Oracle SOA Suite infrastructure, we can use BPEL to achieve this behaviour. Using BPMN, Mediator and BPEL components together in a composite, we can expose 2 interfaces, one for start the business (BPMN) process and other to expose the asynchronous (BPEL) intermediate message, as I'll show below.

First of all, create a new BPM Project with a BPMN component.

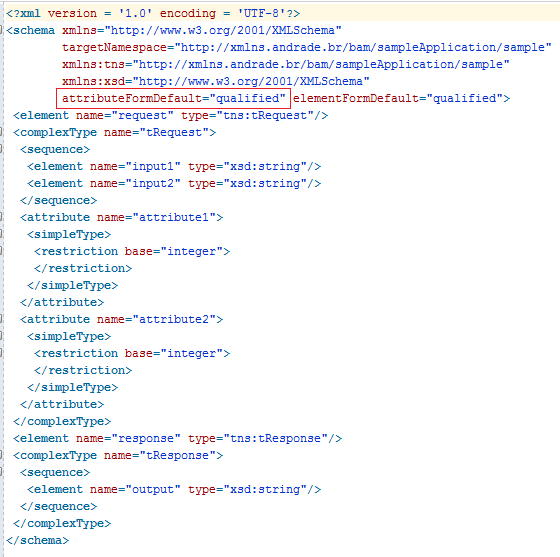
In the "Create BPMN Process" dialog, import an external schema with data definition and define the input and output arguments.


Double click in the "Start" activity and create a new "Data Association".

Create a new "Business Process" variable using the same inputArg data type.

Copy the inputArg data to the new variable created.

Go back to the composite and add a new BPEL component. Select "Based on WSDL" template and define an asynchronous operation using the same external schema.

In the "Request" definition, select an element that has the unique business identifier that will be used to correlate the inbound intermediate operation.

In the "Callback" definition, select an element that define the same message that will be received in the middle of the process.

Uncheck the option "Expose as a SOAP service".

Open the WSDL generated for the BPEL process. Create a new one way operation in the inbound port type to receive the intermediate message in the BPEL process. Use the same callback message that will be returned by the BPEL process.

Open the BPEL process and create a new correlation set in the receiveInput activity.

Initialize the correlation set with the unique business identifier received.

Set the column "Initiate" to "Yes" (To get more informations about how to configure Correlation Sets in BPEL, click here).

Create a new Receive activity to receive the intermediate operation.

Select the intermediate operation and generate a new variable to receive the intermediate message.

Select the correlation set created previously.

Edit the correlation set to match the unique business identifier received in the intermediate message.


Add an Assign activity to the BPEL process to copy the message received in the intermediate operation to the output variable.

The BPEL process will looks like as the image below.

Go back to the composite, add a new Mediator component and select "Interface Definition from WSDL" template.

Define an one-way operation using the same external schema. In the "Request" definition, select the element that define the message that will be received in the middle of the process.


Connect the Mediator to the BPEL component, using the intermediateOperation of the BPEL component as the Target Operation.

Open the Mediator editor and create an Assign to route the received message. Keep the other configurations empty.

Go back to the BPMN diagram, add a Throw event after the Start event. In the "Implementation" tab, select "Message" as "Implementation Type" and "Service Call" in the "Implementation" properties.

Select the BPEL component interface as the service to be called and create a new "Data Association".

Copy the unique business identifier from the business process variable to the service input variable.

Add a new Catch event after the Throw event created. In the "Implementation" tab, select "Message" as "Implementation Type" and "Continues" as "Conversation" option. Select the throw event as "Initiator Node" and create a new "Data Association".

Create a new "Business Process" variable using the same data type as the intermediate operation returns. Copy the data received to the new variable created.

The final BPMN process will looks like this.

And the composite will looks like this.

Deploy the composite to the server and create a new instance of the business process calling the BPMN process interface.


See the execution flow trace.

Check that the BPMN process is waiting in the catch activity.

And the BPEL process is waiting in the receiveIntermediate activity.

Back to the Enterprise Manager, invoke the intermediateOperation through the Mediator interface.

Use the same unique business identifier used to initiate the business process.

See the execution flow trace again. Check that a new instance of the Mediator component was created, but the message was delivered to the BPEL instance created before (through correlation set).

Check that the BPEL instance finished, sending the received message to the caller process.


Check that the BPMN process received the callback message and finished successfully.


This idea can be extended to allow multiple intermediate messages being received during the business process execution. If all intermediate information to be received uses the same message, you can reuse the BPEL process, otherwise you can create additional BPEL components to receive different messages. Other improvement you can do is use the Mediator component in front of all the other components to expose a single interface (WSDL) and route each operation to the appropriate internal composite component.

To download this sample project, click here.

Tuesday, December 7, 2010

Building and Deploying SOA Composite Applications using ANT

The idea of this post is share the file structure we are currently using in our projects to store SOA composite applications. This structure has the aim to allow metadata sharing using MDS and easy migration between environments (developing, test, production) using ANT scripts and configuration plan together. The scripts presented below was created before SOA Suite 11.1.1.3 release, for a project environment where Human Tasks aren't necessary, so deployment of Human Task forms are not supported.

Folder structure:
sca
 |-- bin
 |    |-- .adf
 |    |     |-- META-INF
 |    |     |    |-- adf-config.xml.seed.local
 |    |     |    |-- adf-config.xml.seed.server
 |    |-- template
 |    |     |-- build.xml
 |    |     |-- build-customize.xml
 |    |     |-- local_build.properties
 |    |-- build_ENV.properties
 |    |-- custom-build.xml
 |    |-- custom-build-common.xml
 |    |-- developer_build.properties
 |    |-- global_build.properties
 |-- projects
 |    |-- <project 1>
 |    |      |-- build.xml
 |    |      |-- build-customize.xml (when needed)
 |    |      |-- local_build.properties (when needed)
 |    |      |-- <project directories and files>
 |    |-- <project 2>
 |    |      |-- build.xml
 |    |      |-- build-customize.xml (when needed)
 |    |      |-- local_build.properties (when needed)
 |    |      |-- <project directories and files>
 |-- shared
 |    |-- mds
 |    |    |-- apps
 |    |    |    |-- <project name>
 |    |    |    |      |-- fault-policies
 |    |    |    |      |    |-- <fault policies files>
 |    |    |    |      |-- xsd
 |    |    |    |      |    |-- <directories and XSD files>
 |    |-- build.xml
 |    |-- local_build.properties
 |    |-- shared.jpr

Folders/Files description:

  • sca: root folder where all project data and scripts are stored
  • bin: this folder stores all files necessary to build and deploy SOA applications
  • .adf: this directory structure is the same that exists on Application directories created by jDeveloper.
  • META-INF: template configuration files that contains the information necessary to indicate to the build script where the shared repository (MDS) is located. A copy of one of this file will be created by ANT build script during deployment process and its internal tokens (those started by @) will be replaced by environment specific information from build_ENV.properties (see below). 
  • adf-config.xml.seed.local: file used as template when using local MDS (when mds.local.pat and mds.local.partition properties are uncommented on developer_build.properties). You don’t need to make changes on it.
  • adf-config.xml.seed.server: file used as template when using server MDS (when mds.local.pat and mds.local.partition properties are commented on developer_build.properties). You don’t need to make changes on it.
  • template: folder with files that may be copied to the project root directories.
  • build.xml: file used to build and deploy your SOA project. This file must be copied from template folder to your project root directory and can be called either inside jDeveloper or thru command line. You don’t need to make changes on it.
  • build-customize.xml: file used to customize the project configuration plan according the project needs. This file must be copied from template folder to your project root directory only when customization is needed. You may define, at customize_config_plan target, as many token replacement rules as needed to dynamically customize your project configuration plan with information from properties files. You can use any properties from all build properties files.
  • local_build.properties: this file allows you to create local properties to use only in a specific project. Copy this file from template folder to your project root directory only when local properties are needed.
  • build_ENV.properties: this file allows you to define properties specific for each environment. Create a file for each environment, replacing ENV by the environment name (i.e.: build_dev.properties, build_dit.properties, build_sit.properties, and so on). Set within each file all properties that changes when you deploy projects in different environments.
  • custom-build.xml: this file is used to filter the common built tasks that will be presented when the build.xml is used within jDeveloper. You don’t need to make changes on it.
  • custom-build-common.xml: this file contain common tasks to build, deploy and undeploy SOA Projects. You don’t need to make changes on it.
  • developer_build.properties: this file allows you to define properties related to the local developer environment. Set the priperties accordingly.
  • global_build.properties: this file allows you to define global properties to use in all of your projects. Use this file to define properties that will be shared by more than one process, avoiding redundance in local_build.properties files.
  • projects: this is the location where you will place all of your SOA Project files, using the same folder structure as created by jDeveloper.
  • shared: this directory contains a special project that we use to share metadata (XSDs, WSDLs, Fault-Policies, etc) across multiple SOA projects using MDS.
  • mds/apps/: this is the default directory where we can place all files to be shared. The internal structure of this directory may be defined as needed. All the content of this folder will be deployed to the MDS server. Two folders were already defined: xsd folder, to store shared XSDs, and fault-policies folder, to store shared policies. 
  • build.xml: this file contains tasks to build, deploy and undeploy shared metadata. You don’t need to make changes on it.
  • local_build.properties: this file allows you to create local properties to use only in shared metadata deploy. 
  • shared.jpr: file used to open the shared project within your application in jDeveloper.


Usage:

  •  For each new SOA Project created, a build.xml file must be copied from the /sca/bin/template folder to the main project folder. build-customize.xml and local_build.properties files must be copied if customization is needed (see below);
  •  The ANT scripts expects that a configPlan has been created for all projects. This config plan must have the same composite name plus a "_configPlan" suffix and will be used as a template to generate the environment specific configPlans.
    • To create the config plan, right click on the composite.xml file and select "Generate Config Plan". Accept the default name.
    • Change configuration plan sensitive data by tokens to be replaced during build and deploy (see below).
  • ANT scripts uses a build-customize.xml with search/replace commands to generate a configPlan to a specific environment. If your project needs any kind of environment specific configuration, copy this file from the /sca/bin/template folder to the main project folder and update it with all necessary search/replace commands.
    • create a search/replace for each token created in the config plan
    • If you have any project specific property you want to use during the replacement, copy the local_build.properties file from the /sca/bin/template folder to the main project folder and add all necessary properties.


Additional comments:
  • This sca folder and all sub folders can be managed using any kind of Source Control System, like TFS, CVS or SVN.
  • Currently we aren't storing SOA Applications in our file structure. Each developer create a local empty SOA aplication, get the entire file structure from the source control and open the SOA Projects from the /sca/projects folder directly.
  • When a new project is being created in jDeveloper, it's important to take care that the project folder is created within the /sca/projects folder.
  • Take care of update the configuration plan every time you change the project and new sensitive data must be customized during deployment process (common examples of sensitive data are hostname, port and partition name of other composites used as reference or hostname and port of external services).

To download a clean folder structure to use in your project, click here.
To download a sample folder structure with 2 SOA projects, click here.

Tuesday, September 28, 2010

BUILD FAILED - LIB version problem

Today, during a build and deploy of one of our SOA projects, we were facing the following problem:

Buildfile: C:\Oracle\Middleware\jdeveloper\bin\ant-sca-compile.xml

scac:
[scac] Validating composite "C:\JDeveloper\mywork\ApplicationTest\Hello\composite.xml"

BUILD FAILED
C:\Oracle\Middleware\jdeveloper\bin\ant-sca-compile.xml:236: Java returned: 1 Check log file : C:\JDeveloper\mywork\ApplicationTest\Hello\SCA-INF\classes\scac.log for errors

Total time: 4 seconds

And within the scac.log file the following message was shown:

Exception in thread "main" java.lang.NoSuchMethodError: oracle.fabric.composite.model.CompositeModel.getFolder()Ljava/lang/String;
at oracle.soa.scac.ValidateComposite.loadComposite(ValidateComposite.java:881)
at oracle.soa.scac.ValidateComposite.doValidation(ValidateComposite.java:567)
at oracle.soa.scac.ValidateComposite.run(ValidateComposite.java:156)
at oracle.soa.scac.ValidateComposite.main(ValidateComposite.java:141)

After some evaluation, we identified that this error is caused by a version incompatibility of the lib C:\Oracle\Middleware\jdeveloper\soa\modules\oracle.soa.fabric_11.1.1\fabric-runtime.jar.

But what caused the error if I did a clean install of the jDeveloper?

The answer is: when I installed the jDeveloper, my machine permissions caused that some installation files stay locked (including fabric-runtime.jar). This way, when I installed the SOA Composer plugin, this file couldn't be updated to the new version, necessary to build and deploy SOA Composite applications.

SOLUTION: make sure you have the right permissions during installation. If you are facing this problem, check if the fabric-runtime.jar lib file is locked, change its access permission and try to reinstall the SOA Composer plugin .

Wednesday, September 1, 2010

Generating custom logs with Log4J within Java Embedding activity

To generate custom logs within a BPEL process using a Java Embedding activity and Log4J do the following steps:
  • Copy log4j-1.2.15.jar to <oss_home>/soa/modules/oracle.soa.ext_11.1.1 and execute ANT script in this directory. This will recreate the oracle.soa.ext.jar file adding the log4j lib to the classpath.
  • Create a new folder for Log4j configuration and log files: <middleware_home>/config, for example
    • add to this folder the configuration files (log4j.debug.xml and log4j.dtd, for example)
    • set the log file name and path (<middleware_home>/config/customErrorLog.log, for example) in the log4j.debug.xml
  • Change the startManagedServer script to point to Log4j configuration file: JAVA_OPTIONS="-Dlog4j.configuration=file:<middleware_home>/config/log4j.debug.xml”
  • Restart the SOA managed server.
From a BPEL development perspective, what is necessary to do is:
  • Import the log4j-1.2.15.jar to the project libs (right click in the project name and select “Project Properties”, go to “Libraries and Classpath” and add the jar file)
  • Insert a Java Embedding activity
  • In the BPEL source code, import the Logger class adding the code below before the “bpelx:exec” created for the Java Embedding component
  • <bpelx:exec import="org.apache.log4j.Logger">
    
  • Edit the Java Embedding activity and insert the necessary log instructions like:
  • Logger logger = Logger.getLogger("myCustomLog"); 
    logger.info(">>>> Message log for instance: " + getTitle());

To download the Log4j configuration files together with a Composite with a sample use of the log, click here.

Wednesday, July 21, 2010

Soa Suite 11g - Fault recovery

Using the Oracle SOA Suite's Infrastructure Management Java API, it's possible to query the BPEL Engine for faults and recover this faults programmatically using the following Facades:
  • Locator: entry point to Facades API.
  • BPELServiceEngine: allows to query for faults, get and set variables data and recovery faults.
  • Fault: allows retrieve fault details information.
  • FaultRecoveryActionTypeConstants: contains Action constants used to recover faults.
To develop the Java code, create a new Java project in jDeveloper and import the following libs:
  • <middleware_home>/oracle_common/modules/oracle.fabriccommon_11.1.1/fabric-common.jar
  • <middleware_home>/jdeveloper/soa/modules/oracle.soa.mgmt_11.1.1/soa-infra-mgmt.jar
  • <middleware_home>/wlserver_10.3/server/lib/weblogic.jar
  • <middleware_home>/jdeveloper/soa/modules/oracle.soa.fabric_11.1.1/oracle-soa-client-api.jar
  • <middleware_home>/oracle_common/webservices/wsclient_extended.jar
The example below shows how to use the API to search for faults using filter, update variable data and do a Retry to recover the fault:
package br.inf.andrade.soasuite.faultRecovery;

import java.util.Hashtable;
import java.util.List;

import javax.naming.Context;

import oracle.soa.management.facade.Fault;
import oracle.soa.management.facade.FaultRecoveryActionTypeConstants;
import oracle.soa.management.facade.Locator;
import oracle.soa.management.facade.LocatorFactory;
import oracle.soa.management.facade.bpel.BPELServiceEngine;
import oracle.soa.management.util.FaultFilter;

public class FaultRecovery {

  private Locator locator = null;
  private BPELServiceEngine mBPELServiceEngine;

  public FaultRecovery() {
    locator = this.getLocator();
    try {
      mBPELServiceEngine =
          (BPELServiceEngine)locator.getServiceEngine(Locator.SE_BPEL);
    } catch (Exception e) {
      e.printStackTrace();
    }
  }

  public Hashtable getJndiProps() {
    Hashtable jndiProps = new Hashtable();
    jndiProps.put(Context.PROVIDER_URL,
                  "t3://soaserver11gr1ps2:8001/soa-infra");
    jndiProps.put(Context.INITIAL_CONTEXT_FACTORY,
                  "weblogic.jndi.WLInitialContextFactory");
    jndiProps.put(Context.SECURITY_PRINCIPAL, "weblogic");
    jndiProps.put(Context.SECURITY_CREDENTIALS, "welcome1");
    jndiProps.put("dedicated.connection", "true");
    return jndiProps;
  }

  public Locator getLocator() {

    try {
      return LocatorFactory.createLocator(getJndiProps());
    } catch (Exception e) {
      e.printStackTrace();
    }
    return null;
  }

  public void recoverFaults() {
    try {
      System.out.println("Get Recoverable Faults");

      /*
       * SEARCH FOR FAULTS
       */

      //Set filter according desired criteria
      FaultFilter filter = new FaultFilter();
      //filter.setCompositeDN("default/FaultClient!1.0");
      //filter.setCompositeInstanceId("40001");
      //filter.setComponentName("FaultClientProcess");
      //filter.setComponentInstanceId("bpel:40001");
      //filter.setId("default/FaultClient!1.0*soa_911ae0fd-c5ca-44ae-922c-6641a4e7d51f/FaultClientProcess/40001-BpInv0-BpSeq0.3-3");
      //filter.setFaultName("{http://xmlns.oracle.com/FaultRecovery_jws/FaultGenerator/FaultGeneratorProcess}BusinessFault");
      //filter.setLike("%<code>0001%");
      filter.setRecoverable(true);

      //Get faults using defined filter
      List<fault> faultList = mBPELServiceEngine.getFaults(filter);
      for (Fault fault : faultList) {
        System.out.println("=============================================================================================================");
        System.out.println("         Composite DN: " +
                           fault.getCompositeDN().getStringDN());
        System.out.println("Composite Instance ID: " +
                           fault.getCompositeInstanceId());
        System.out.println("       Component Name: " +
                           fault.getComponentName());
        System.out.println("Component Instance ID: " +
                           fault.getComponentInstanceId());
        System.out.println("        Activity Name: " + fault.getLabel());
        System.out.println("             Fault ID: " + fault.getId());
        System.out.println("           Fault Name: " + fault.getName());
        System.out.println("     Recoverable flag: " + fault.isRecoverable());
        System.out.println("        Fault Message: " + fault.getMessage());

        //Get fault variables
        String[] variables = mBPELServiceEngine.getVariableNames(fault);
        System.out.println("+-+-+-+-+-+-+-+-+-+-+-+-+-+-+-+-+-+-+-+-+-+-+-+-+-+-+-+-+-+-+-+-+-+-+-+-+-+-+-+-+-+-+-+-+-+-+-+-+-+-+-+-+-+-+");
        System.out.println("Variables:");
        for (int i = 0; i < variables.length; i++) {
          System.out.println("* Name: " + variables[i]);
        }

        //Get operation input variable data, correct it and update the variable content
        System.out.println("+-+-+-+-+-+-+-+-+-+-+-+-+-+-+-+-+-+-+-+-+-+-+-+-+-+-+-+-+-+-+-+-+-+-+-+-+-+-+-+-+-+-+-+-+-+-+-+-+-+-+-+-+-+-+");
        System.out.println("Operation Input Variable Data:");
        String value =
          mBPELServiceEngine.getVariable(fault, "invokeFaultGenerator_process_InputVariable");
        System.out.println("Old value: " + value);
        value = value.replace("BusinessFault", "Any string");
        System.out.println("New value: " + value);
        mBPELServiceEngine.setVariable(fault,
                                       "invokeFaultGenerator_process_InputVariable",
                                       value);

        //Retry each fault
        mBPELServiceEngine.recoverFault(fault,
                                        FaultRecoveryActionTypeConstants.ACTION_RETRY,
                                        null);
      }

      //Instead of recover each fault individually, you can recover all faults in a single API call
      //mBPELServiceEngine.recoverFaults(faultList.toArray(new Fault[faultList.size()]), FaultRecoveryActionTypeConstants.ACTION_RETRY);


    } catch (Exception e) {
      e.printStackTrace();
    }
  }

  public static void main(String[] args) {
    FaultRecovery faultRecovery = new FaultRecovery();
    faultRecovery.recoverFaults();
  }
}
To download this source code together with 2 SOA Composites to simulate a Business Fault, click here.